
iptables is a powerful, built-in command-line utility used to configure the Linux kernel’s Netfilter firewall. It works by inspecting network packets and deciding what to do with them based on a set of user-defined rules.
Here is a comprehensive overview of how iptables works, its core architecture, and how to configure it.
1. The Core Architecture: Tables, Chains, and Targets
To master iptables, you need to understand how it organizes rules. It uses a hierarchy of Tables, which contain Chains, which contain individual rules that point to Targets.
The 3 Main Tables
- Filter Table: The default and most frequently used table. It makes the actual decision of whether a packet should be allowed to pass through or not.
- NAT Table (Network Address Translation): Used for routing packets to different networks or modifying the source/destination IP addresses (e.g., port forwarding).
- Mangle Table: Used for specialized packet alteration (like modifying TTL or TOS fields).
The 5 Built-in Chains
Chains are specific points in a network packet’s journey where iptables can intervene:
- PREROUTING: Alters packets before making a routing decision (NAT/Mangle).
- INPUT: Handles packets destined for the local server itself.
- FORWARD: Handles packets routed through the server (e.g., if the server acts as a router).
- OUTPUT: Handles packets generated by and leaving the local server.
- POSTROUTING: Alters packets after the routing decision has been made, just before they leave the network interface.
Common Targets (Actions)
When a packet matches a rule, it is directed to a target:
- ACCEPT: Allows the packet to pass through.
- DROP: Silently blocks the packet. The sender receives no notification.
- REJECT: Blocks the packet and sends an error packet (like ICMP “port unreachable”) back to the sender.
- LOG: Logs the packet details to syslog for debugging without stopping the packet’s journey.
2. Essential IPTables Commands
⚠️ Warning: When configuring iptables over SSH, be incredibly careful. One wrong command can instantly lock you out of your server. Always ensure you have an alternative way to access the server (like a cloud console) or set up a cron job to clear rules every 10 minutes while testing.
Viewing Rules
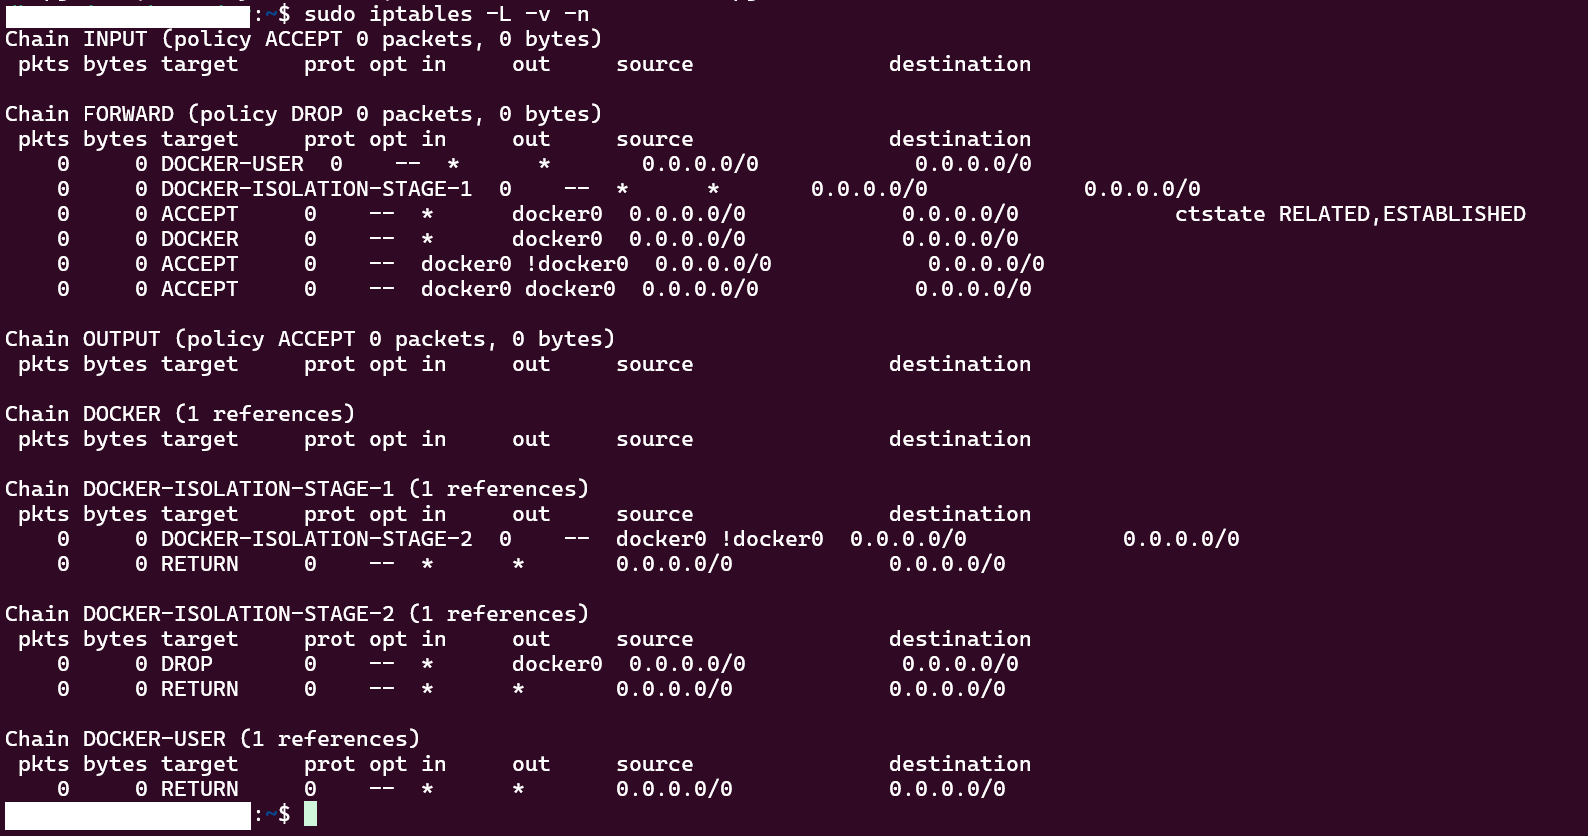
To see your current firewall configuration with line numbers (great for editing):
sudo iptables -L -v -n --line-numbers- -L: List rules.
- -v: Verbose output (shows packet/byte counters).
- -n: Numeric output (displays IP addresses and ports as numbers instead of resolving DNS/service names).
Setting Default Policies
Before defining specific rules, you should set the default behavior for the main chains. A secure “whitelist” approach drops all incoming traffic by default and explicitly allows trusted traffic.
sudo iptables -P INPUT DROP
sudo iptables -P FORWARD DROP
sudo iptables -P OUTPUT ACCEPT
Allowing Crucial Traffic
If you set your default INPUT policy to DROP, you must explicitly allow the following traffic immediately, or your server will break:
# 1. Allow loopback traffic (local applications talking to each other)
sudo iptables -A INPUT -i lo -j ACCEPT

# 2. Allow established and related connections (so replies to your outbound traffic get back in)
sudo iptables -A INPUT -m conntrack --ctstate ESTABLISHED,RELATED -j ACCEPT

# 3. Allow incoming SSH (Port 22) so you don't lock yourself out
sudo iptables -A INPUT -p tcp --dport 22 -j ACCEPT- -A INPUT: Append the rule to the INPUT chain.
- -i lo: Matches the loopback interface.
- -p tcp: Matches the TCP protocol.
- –dport 22: Matches destination port 22.
- -j ACCEPT: Jump to the ACCEPT target.
Blocking Specific IP Addresses
If you notice malicious activity from a specific IP address (192.168.1.100), you can block it entirely:
sudo iptables -A INPUT -s 192.168.1.100 -j DROPDeleting Rules
You can delete a rule by specifying its exact parameters, or much more easily, by its line number:
# Delete rule number 3 from the INPUT chain
sudo iptables -D INPUT 3
3. Saving Your Rules
By default, iptables rules are stored entirely in memory. If your Linux server reboots, all your rules will be lost. To make them permanent, you need to save them.
On Ubuntu/Debian:
sudo apt install iptables-persistent
# During installation, it will ask if you want to save current rules.
# To manually save later:
sudo netfilter-persistent save
On CentOS/RHEL/Fedora:
sudo iptables-save > /etc/sysconfig/iptablesA Note on Modern Linux Systems
While iptables is still heavily used and foundational to understand, modern Linux distributions (like Ubuntu 20.04+ and RHEL 8+) have transitioned to nftables as the backend framework.
Front-end tools like UFW (Uncomplicated Firewall) on Ubuntu or Firewalld on RHEL provide a much simpler syntax while managing these complex backend rules for you. However, iptables commands are still translated seamlessly on most modern systems via compatibility layers (iptables-nft).
Are you looking to secure a specific application (like a web server or database), or are you trying to configure a Linux machine to act as a router/NAT gateway?