
Windows Defender Firewall is one of the most effective, built-in tools for securing a Windows machine. It operates by inspecting incoming and outgoing network packets and either allowing or blocking them based on a set of defined rules.
Here is a practical guide to restricting network traffic using Windows Firewall, covering both the Graphical User Interface (GUI) and PowerShell.
1. Understanding the Core Profiles
Windows Firewall categorizes networks into three profiles. Restricting traffic effectively requires knowing which profile you are modifying:
- Domain Profile: Applies when the machine is connected to a network where the computer account is authenticated by an Active Directory domain controller.
- Private Profile: Used for trusted networks, like a home or small office network, where the device is hidden from the internet but visible to local devices.
- Public Profile: The most restrictive profile. Used for untrusted networks, like public Wi-Fi at a coffee shop or airport.
2. Restricting Traffic via the Advanced GUI
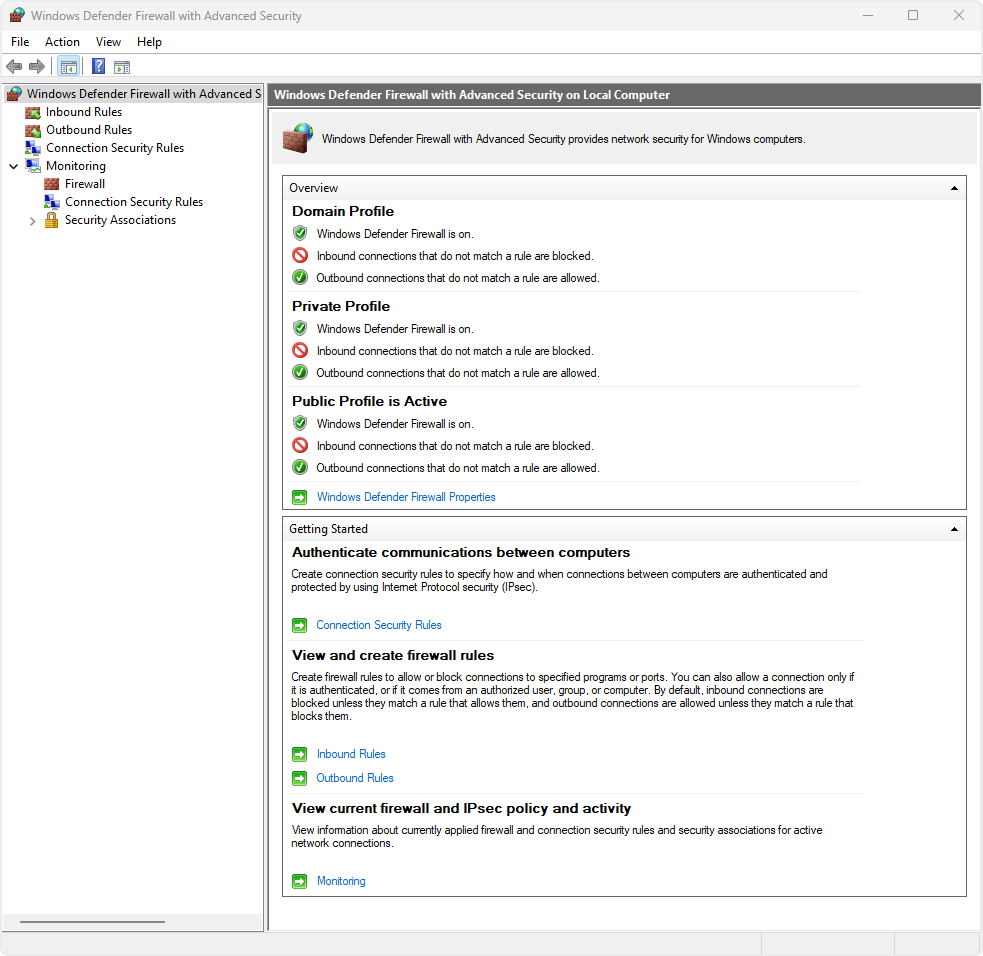
To get granular control, you should use the Windows Defender Firewall with Advanced Security console.
Step 1: Open the Advanced Console
- Press Win + R, type wf.msc, and press Enter.
- This opens a dashboard showing the state of your Domain, Private, and Public profiles.
Step 2: Set the Default “Block” Behavior
By default, Windows Firewall blocks all unauthorized inbound traffic but allows all outbound traffic. To strictly restrict a machine, you can change the default outbound behavior to block everything except what you explicitly allow.
- In the right-hand actions pane, click Properties.
- Select the tab for the profile you want to modify (e.g., Public Profile).
- Change Outbound connections from Allow (default) to Block.
- Click Apply.
⚠️ Warning: Doing this will immediately cut off internet access for most apps until you create explicit “Allow” rules for them.
Step 3: Create a Custom Restriction Rule
Let’s block a specific application (or port) from communicating outside the network.
- Click on Outbound Rules (or Inbound Rules) in the left sidebar.
- In the right pane, click New Rule…
- Choose the rule type:
- Program: To restrict a specific .exe file.
- Port: To restrict traffic on specific TCP/UDP ports (e.g., Port 80/443 for web traffic).
- Follow the wizard prompts:
- If Program, browse to the path of the application.
- If Port, specify the exact port numbers.
- On the Action page, select Block the connection.
- Choose which profiles (Domain, Private, Public) this restriction applies to.
- Name the rule (e.g., “Block App X Outbound”) and click Finish.
3. Restricting Traffic via PowerShell (Fastest Method)
If you are managing multiple machines or prefer the command line, PowerShell is highly efficient. You must run PowerShell as an Administrator.
Block a Specific Program
To block a specific app from sending traffic outbound:
New-NetFirewallRule -DisplayName "Block Unwanted App" -Direction Outbound -Program "C:\Path\To\App.exe" -Action BlockBlock a Specific Port
To block outbound traffic on port 21 (FTP):
New-NetFirewallRule -DisplayName "Block FTP Outbound" -Direction Outbound -LocalPort 21 -Protocol TCP -Action BlockIsolate a Machine (Except for Core Services)
If you suspect a machine is compromised and want to quickly lock down all outbound traffic while retaining a way to manage it:
# Set default outbound to block
Set-NetFirewallProfile -Profile Domain,Private,Public -DefaultOutboundConnection Block

# Allow only DNS (Port 53) so domain controllers can resolve names
New-NetFirewallRule -DisplayName "Allow Outbound DNS" -Direction Outbound -Protocol UDP -RemotePort 53 -Action Allow
4. Best Practices for Firewal Restrictions
- Order of Precedence: In Windows Firewall, an explicit Block rule always trumps an Allow rule. If an application matches both an allow rule and a block rule, it will be blocked.
- Log Dropped Packets: If you are troubleshooting why a restriction isn’t working (or blocking too much), enable logging. In the Firewall Properties, go to the Logging section, click Customize, and set Log dropped packets to Yes. You can view this log file at C:\Windows\System32\LogFiles\Firewall\pfirewall.log.